Saturday, March 2, 2013

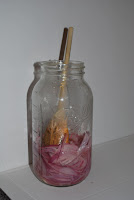
Finally, back in the kitchen again! Or, pickled red onions.


Wow- it's been over a year since my last post. Lots has happened, including the birth of our first baby! 3 months later and I'm finally back in the kitchen again. Long gone are the days where I can spend hours coming up with the perfect recipes and taking my time making them. I've learned about planning ahead and prepping ahead-- it's the only way I can possibly cook anything from scratch anymore. 

The other day I was feeling particularly motivated and wanted to cook something. I did a new twist on lasagnchiladas and thought some pickled onions would be awesome with them. Pickled onions are the greatest condiment- they add acidity, salt, a little sweetness, and oniony goodness. Oh, and who doesn't love a splash of pink on their plate?? They're ubiquitous in Mexican cuisine-- not Tex-Mex, but actual Mexico-- so I thought they'd be a great accompaniment to my decidedly unauthentic Mexican dish.  

This was simple and easy to make, and made an already good dish even better! 


Pickled Onions

Ingredients

  • 1 large red onion, peeled and sliced thin, root to stem 
  • 1 clove garlic, peeled and smashed (NOT chopped, minced, or pressed)
  • 1 tsp. salt 
  • 1 cup vinegar (I used plain ol' white vinegar, but apple cider, red wine, or a combination would work just as well)
  • Juice from 2 limes
Directions
  • Bring a couple cups of water to a boil. Put the onions in boiling water for about 30 seconds. Remove from heat and drain. 
  • While the water is heating up, mix other ingredients in a jar or bowl until salt is dissolved.
  • Add the drained onions to the jar. Let sit on the counter for about 4 hours, until flavors are well melded and liquid is pink.
  • Serve with anything that could use a little acidity to brighten it up! 


Monday, February 20, 2012

Coconut Corn Chowder


Having recently gotten rid of most of the soup in the freezer and it being the middle of February, I'd had a hankering to make some sort of soup for awhile. I love making soup. Inspiration came in the form of a great deal at Kroger- yellow corn was 10 for $1. I had to pick through it, but I ended up finding 10 great looking ears of corn! I had some cream left over from making the cinnamon rolls, so I decided on a delicious chowder. I happened upon some coconut milk while picking up rice wine vinegar, so thought I'd put a twist on the traditional chowder. We had some fresh thyme left over from the brisket I made earlier in the week, so that's the herb of choice... and of course a healthy dose of garlic and onions. (Because really, what dish is complete without garlic and onions?) Following the lead from my good ol' ATK corn chowder recipe, I went with cutting the kernels of 4 of the cobs, and grating/milking the other 6 and keeping them separate.
With that big time consuming thing out of the way, I heated a big dutch oven on medium-high. Once it was good and hot, I put in a few chunks of my seasoning bacon from the farmer's market. While that was browning, I chopped up my onion and got a little butter. I added that to the pot, turned it to low, and let it cook covered for about 12-15 minutes, til the onions were browning, fragrant and soft. In the meantime, I diced potatoes, minced garlic, opened my coconut milk, measured stock and got a bay leaf and thyme. 

I took out the bacon chunks and set them aside, and added the garlic to the onions. When that was fragrant, I added 3 tablespoons of chia flour to the onion and cooked it for about two minutes. Next, I added the stock, stirring constantly. In with the potatoes, coconut milk, bay leaf, thyme, the bacon chunks and the grated corn/pulp mixture. Bring it to a boil, reduce heat, and simmer until the taters are tender.
In with the kernel corn, the cream, a little salt and some pepper. Simmer until the kernels are tender but still crunchy. Toss the bacon and the bay leaf, then serve with bread. 

I didn't have any around, but I'd really like to add some curry powder to the next batch- I think it would complement this dish wonderfully. 

Coconut Corn Chowder
Adapted from ATK's The New Best Recipe cookbook

Ingredients
  • 10 ears corn
  • seasoning bacon (a few chunks) or a few slices bacon
  • 1 Tablespoon butter
  • 1 large onion, chopped
  • 4-5 cloves garlic
  • 3 Tablespoons flour (I used chia seed flour, making this gluten-free)
  • 3 cups chicken stock
  • 3 red potatoes, scrubbed and diced small
  • 1 bay leaf
  • fresh thyme leaves from 1-2 sprigs
  • 1 can coconut milk
  • 1 cup cream
  • salt and pepper to taste
Directions
  • Cut the kernels from 4 ears of corn, place in a bowl and set aside. Grate the remaining 6 ears, then milk the rest of the ears (use the back side of a knife to scrape the pulp out of the grated ears) set the kernels and pulp aside. 
  • Heat a dutch oven over medium heat. When it's hot, add country bacon chunks. Let cook until browned and crispy. Add onion to the pot, cover and cook until browned and softened. Remove the bacon chunks  to the bowl of corn pulp and add minced or pressed garlic. Cook until fragrant, then add the flour, stirring for a couple minutes until incorporated and a paste forms. 
  • Stirring constantly, add stock, followed by potatoes, bay leaf, thyme, coconut milk, bacon chunks and corn pulp mixture. Heat to boiling, then simmer until the potatoes are tender. Add the cut kernels and cream, return to a simmer and cook until the kernels are tender, about 5 minutes. 
  • Serve and enjoy! (Tonight I had it with toasted rosemary-potato bread that's starting to get stale... Tomorrow I'll make that bread into croutons which will make great toppers for the rest of the week!)


Homemade Cinnamon Buns with White Chocolate Cream Cheese Glaze


So, I have a confession to make... Prior to yesterday, cooking with live yeast really intimidated me/freaked me out. It just seemed really difficult or complex or... something, but it turns out it's not! I was determined to at least try, so I picked up some yeast last time I was at the store and opened my trusty-dusty copy of America's Test Kitchen's The New Best Recipe cookbook once I got home. In the "yeast breads" section, I found glazed cinnamon rolls. It being Sunday and me having Monday off, (thank you President's Day!) I decided this was my project. (This way, even if it didn't work out, I'd still have cream cheese glaze, cinnamon and sugar working for me... it couldn't be that bad!)

Based on a couple things, I tweaked the recipe a little. Not the dough part, so much, as the filling and glazing part. The first thing: the ATK recipe did not have butter brushed over the dough before the filling was added. I knew that had to change- when I worked at Mary Mac's I clearly remember the huge table-sized rolls of dough being brushed with butter before sprinkled with cinnamon and sugar. The second thing: I was convinced by some fancy marketing (interesting packaging) in the cream cheese section to purchase some white chocolate cream cheese in addition to plain cream cheese. How does a little white chocolate in the glaze not sound good!?!?!

I'm glad I started this project early in the day yesterday- 4 hours of letting the dough rise alone was time consuming but not labor-intensive. 6 hours after I started, I had big, beautiful, cool enough to be frosted and eaten cinnamon rolls. YUM!


Cinnamon Rolls with White Chocolate Cream Cheese Glaze
Adapted from America's Test Kitchen New Best Recipe Cookbook 

Ingredients

Dough
  • 1/2 cup milk
  • 8 tablespoon unsalted butter
  • 1/2 cup warm water (110 degrees)
  • 1 envelope (2 1/4 tsp.) instant yeast
  • 1/4 cup sugar
  • 1 large egg, plus 2 large yolks
  • 1 1/2 teaspoons salt
  • 4-41/4 cups unbleached AP flour, plus more for dusting the work surface
Icing
  • 4 ounces plain cream cheese, softened but still cool
  • 4 ounces Philadelphia White Chocolate Indulgence cream cheese
  • 2 tablespoons light corn syrup 
  • 2 tablespoons heavy cream
  • 1 cup confectioner's sugar, sifted to remove lumps
  • 1 teaspoon vanilla extract
  • pinch salt
Filling
  • 2 tablespoons butter, melted
  • 3/4 cup packed light brown sugar
  • 3 tablespoons ground cinnamon
  • 1/8 teaspoon salt
Directions
  • For the dough, heat milk and butter in a small saucepan or in the microwave until the butter melts. Remove from heat and set aside until the mixture is lukewarm, about 100 degrees.
  • In the bowl of a stand mixer fitted with the paddle, mix water, yeast, sugar, egg, and yolks at a low speed until well mixed. Add salt, warm milk mixture, and 2 cups of the flour. Mix on medium until well blended, about a minute. Switch to dough hook, add 2 more cups of flour. Knead at medium, adding 1 Tbsp more flour at a time if needed, until the dough is smooth and freely clears the sides of the bowl, about 10 minutes. Remove dough onto lightly floured counter. Shape into a ball and put in a lightly oiled bowl. Cover with plastic and leave in a warm, draft-free spot until doubled in size- 1.5-2 hours. 
  • For the icing, while the dough is rising, combine all the icing ingredients in the bowl of the stand mixer. Blend at low until combined, then high for about 2 minutes until smooth and free of lumps. Move to small bowl, cover and refrigerate. 
  • Roll it up! After the dough's doubled, press it down and turn out onto very lightly floured work surface. Roll it out until a 16"x12" rectangle is formed, with the long side facing you. In a small bowl, mix the dry filling ingredients. Brush the dough with the melted butter, then sprinkle evenly with the dry ingredients, leaving a half-inch border along the top edge. Carefully roll up dough, tightening with your fingers as you go. When you reach the end, seal the top seam with water and dust the whole roll with flour. Grease a 13"x9" baking dish. Cut into 12 equal pieces with dental floss. (Slide floss under, then tighten ring. First cut in the middle to form two equal pieces, then cut each of those in half, then cut each remaining piece into 3 pieces). Place the rolls in the dish. Cover with plastic wrap and place in warm, draft-free spot until doubled, 1.5-2 hours.


  • Bake it! When the rolls are almost doubled, preheat to 350 with oven rack in middle position. Bake until the rolls are golden brown and an instant-read thermometer inserted into the center of the rolls reads 185-188 degrees, about 25-30 minutes. Invert the rolls onto a wire rack and cool for 10 minutes. (Do this over parchment or a baking sheet- mine were dripping cinnamon-sugar yumminess all over the counter) Turn them over on a large plate and use a spatula to spread the icing all over them. Serve immediately. 

Monday, February 6, 2012

Lasagnchiladas!

So... I came up with this idea when the hubs and I were trying to figure out dinner plans for the week. He's been begging for lasagna for awhile and I've managed to get around it by making various other pasta dishes (I hate lasagna. More like loathe, detest, abhor lasagna- ricotta cheese freaks me out. Plus I've never been a huge fan of Italian food.) Anyway, he really wanted some lasagna. But then chorizo got thrown into the conversation, and I had my revelation... Mexican Lasagna... LASAGN-CHILADAS!!! I started out trying to make some corn noodles. That did not go well, I need to spend more time figuring that out. So 2 eggs, 1 1/3 cups AP flour and an hour later and I had fresh lasagna noodles.

In the meantime, I julienned 2 onions and sauteed them with a pound of chorizo.
Once the onions were softened, I added a large can of diced green chiles. While that was cooking and the lasagna was drying a little, I threw a pound of quesadilla cheese in the food processor and shredded it.
Then it was just assembly.
Some canned enchilada sauce (I'm gonna figure out how to make my own-- next time) on the bottom, then noodles, chorizo mixture, quesadilla cheese and cotija cheese.
Layer and repeat. This is an instant classic in our house. It's sort of lasagna, which Mr. Beez likes, and sort of Mexican, which he loves. Win-win!


Lasagnchiladas

Ingredients
  •  Lasagna noodles (Homemade or boxed)
  • 1 pound chorizo sausage
  • 2 onions, julienne
  • 1 pound quesadilla cheese
  • Cotija cheese (or parmesan)
  • 1 large can diced green chiles
  • 2 cans enchilada sauce- red or green, your call
Directions
  •  Preheat oven to 350. Heat a saute pan over medium high heat. Add onions and chorizo. Cook until onion is softened and chorizo is browned. Drain excess fat and add green chiles. While the chorizo is cooking, shred quesadilla cheese.
  • In a 13 x 9 casserole, put a thin layer of enchilada sauce. Add a single layer of lasagna noodles. Top with about 1/4 of the chorizo mixture, then quesadilla cheese, a little cotija and some more enchilada sauce. Spread the sauce evenly over the layer.
  • Continue layering until you run out of chorizo mixture. Top with a final layer of noodles, enchilada sauce, and both cheeses.
  • Bake at 350 for about 45 minutes or until cheese is bubbly and beginning to brown. I rotated mine halfway through cooking because my oven doesn't cook all that evenly.
  • Let cool, cut, serve, and ENJOY!

I will figure out how to make those corn noodles and this dish will go from awesome to awesom-er!
Also, add jalapenos for added heat, but with the chorizo and green chiles, it's hot enough for us!


Thursday, January 19, 2012

American By Birth, Southern By the Grace of God: Maw-Maw Falls' Vegetable Soup

Maw-Maw Falls
The late, great Lewis Grizzard used to say he was "American by birth, Southern by the grace of God." I can identify. I love being from the South, and I love coming from a long line of amazing Southern cooks. I'm fortunate enough to have known both of my maternal great-grandmothers (who were, in fact, amazing Southern cooks), and remember times spent with them very well. Like so many other great memories, food plays a huge part in my memories of time spent with them.  Every Sunday we'd all head up to my Ma-maw and Pa-paw Ford's (Mom's dad's parents) house for a huge spread, with vegetables fresh from their garden out back and gorgeous, delicious desserts. I always had to help Ma-maw make the cornbread- it was my special job. (And the cast iron cornbread stick pan is hers- it makes the best cornbread ever. I highly recommend getting a stick pan if you're going to make Southern cornbread often. It has more surface area, and therefore more crusty goodness. Plus your cornbread looks like a corn cob- how fun is that?!)

My other great-grandma, Maw Falls lived with my grandparents and took care of me and my brother after school. She was always cooking up something tasty. One of my favorites was her vegetable soup. We'd come in the house after school and an electric pot would be sitting on the counter bubbling away and smelling so good. It was full of veggies, lots of them frozen or canned from the garden. In fact, I was asking my mom where to get "flat green beans" (pole beans) from the store, and she said, "Oh, I think those were the ones they canned..." So I have to settle for regular green beans until I can grow my own flat ones. In any case, here's Maw-Maw Falls' vegetable soup recipe.

Maw-Maw Falls' Vegetable Soup


Ingredients:
  • carrots, diced or cut into rounds
  • celery, diced
  • onion, diced
  • fresh or frozen peas (crowder, zipper, black-eye, pigeon, whatever you've got- I used some frozen lima beans from my grandpa's garden and a handful of frozen crowder peas)
  • fresh or frozen okra (if frozen, about half a bag)
  • half a head of cabbage, chopped
  • fresh, frozen, or home-canned green beans (flat/pole beans are my favorite!)
  • tomatoes- fresh if they're in season, home-canned or canned if not. 
  • water 
  • butter
  • salt and pepper
  • cayenne pepper
  • bay leaf
  • (optional stock- chicken, turkey, veggie)

Directions
  • Saute carrots, onions and celery in a large dutch oven until softened. 
  • Add the rest of the ingredients. (note: Maw-maw made hers with water and butter- I used some turkey stock I had frozen from Thanksgiving, my mom uses low-sodium chicken stock. The water/butter way works great, but takes a little longer for the flavors to meld)
  • Let cook until vegetables are tender and flavors are melded. Adjust seasoning and serve with cornbread. 


The great thing about this recipe is you can put pretty much whatever you have lying around in it. Corn, potatoes, different beans, squash... the possibilities are endless. You can add some fresh herbs if you happen to have them- thyme is a good option. Have fun with this great (and super-healthy) soup!

Southern Cornbread
Adapted from Cooks Illustrated- this isn't my great-grandma's recipe (I'll post it another time) but it's fantastic!


Ingredients:

  • 4 tsp. bacon drippings
  • 1 cup stone-ground cornmeal
  • 2 tsp. sugar
  • 1/2 tsp. salt
  • 1 tsp. baking powder
  • 1/4 tsp. baking soda
  • 1/3 cup rapidly boiling water
  • 3/4 cup milk (or buttermilk)
  • 1 large egg, lightly beaten
Directions:
  • Put a daub of bacon drippings in each muffin tin, corn stick mold, or 8" round pan. Place pan on lower-middle rack and heat oven to 450. 
  • Put half the cornmeal in a large bowl. In a small bowl, mix the remaining cornmeal and other dry ingredients and set aside.
  • Pour bowling water into the bowl of just cornmeal and mash into a paste. Whisk in the milk gradually, working out the lumps. Whisk in the egg. 
  • Once the oven is preheated, add the dry ingredients and stir until just combined. Pour into the hot tins from liquid measuring cup. Bake 13-20 minutes, depending on size of pan.
  • Remove from oven and immediately flip onto a wire rack, gently using a butter knife to pry it out if necessary. Cool 5 minutes and serve. 


Wednesday, January 18, 2012

German Comfort Food: Rindsrouladen and Knödel

Rindsrouladen mit Knödel

So... after an awesome weekend camping in Georgia's Alpine village of Helen, I really wanted some good German food. Now, anybody can make Schnitzel, and I was kinda over chicken and veal seemed a little extravagant for a Tuesday night, so I decided to make Rindsrouladen (which translates to something along the lines of "rolled beef") with Knödel (which translates to "dumplings" but are known affectionately around our house as "gutbombs")

I don't know why this idea sounded less extravagant than Schnitzel, especially since this menu warranted a trip to the farmer's market and it was already 6 o'clock when I came up with it. (On a side note, this is NOT a weeknight meal. or at least not one you start cooking at 7.) In any case, I was determined to have it so I recklessly proceeded and eventually had a wonderful dinner.

Rindsrouladen is beef (usually a tougher cut- since it's getting braised the slow-and-low makes it nice and tender) that's stuffed with bacon, onions, pickles and mustard. What's not to love?! All that gets rolled up and then braised in wine and broth for a couple hours. The result is a savory, tender dish and some flavorful jus that, with a little bit of flour, becomes gravy. (Who doesn't love gravy!)

Gravy always deserves something to be poured on, and Spätzle (German egg noodles) is a common accompaniment to Rindsrouladen, but I wanted to try my hand at making Knödel instead. You can buy easy Knödel in the ethnic section of some grocery stores and they're pretty good. But they're really simple to make and it's pretty rewarding to end up with some made with love.

Rindsrouladen

Ingredients:
2 pounds beef top round (cut 1/2" thick if you can find it) cut into 4 even pieces
2 Tbsp German mustard (if you don't have German mustard, use anything but yellow)
3 red onions, chopped up
a few slices bacon, cut up (I used peppered seasoning bacon that comes in big chunks from the f.m.)
1/3 c pickles, diced (I used German cornichons, but any dill'l do.)
1Tbsp vegetable oil
salt and pepper
2 c. beef stock
2 c. red wine (2 Buck Chuck, my cooking hero)

Directions:
  • Cook the bacon in a dutch oven until crispy. Remove the bacon to a medium-sized bowl and leave the fat in the pan. Add the onions and cook about 5-7 minutes until softened, fragrant, and slightly browned.
  • Mix onions with bacon. Add pickles and mustard, stir until mixed.
  • Place your meat on a plastic wrap-covered cutting board. Cover the top of the meat with plastic wrap as well. This is the fun part!


  • Completely pulverize the meat until it's thin enough to roll up, about 1/4" thick. Be careful not to hit it too hard and get holes in it. This is a great time to work out aggression or frustration, but it can be annoying if you have people living below you, so be mindful! (BTW, what's up with the Germans and pounding their meat? Schnitzel calls for use of the meat mallet, too- and if you don't have a meat mallet, the rolling pin works great as well) 
  • Once your pieces are pounded out, season the beef with salt and pepper on both sides, then scoop 1/4 of the bacon-onion-pickle mixture onto them. Spread it out kinda evenly and then roll it up. Some of your filling will fall out. Don't stress it.

  • Using kitchen twine, tie each roll up so it's secure. You can use toothpicks, too, but I usually don't because inevitably I end up forgetting one and then somebody gets a bite of wood.
  • Add oil to your dutch oven over medium-high heat and brown all sides of the rolls. (Really brown them. Let them sit there a couple minutes each side so they get a nice dark color) You might want to do this in a couple batches so each one has room to cook.
  • After everything's browned, put them in the dutch oven. (You can toss any of the filling that fell out during the rolling process into the pot, too) Add the beef stock and wine, cover, and cook for 1.5-2 hours, or until beef is very tender.
  • Remove the rolls to a cutting board and let rest. Add either cornstarch or flour mixed with water to the juice in the pot and thicken until desired gravy consistency is reached. Slice the rolls and serve with Knödel and top everything with gravy. Braised cabbage would also go really well on this plate.    

Knödel

Ingredients:
6 cups stale bread, cubed (I used homemade croutons, works just as well)
1 cup milk, warm
5 eggs
2 Tbsp parsley
1 red onion, diced
1/2 Tbsp butter

Directions:
  • Put bread cubes in a bowl, pour the warm milk over them.

  • Heat butter in skillet, add onion and parsley and cook until softened, about 5 minutes. Add to bread mixture.
  • Gently whisk the eggs and add to mixture. Stir until everything is well coated. Cover with saran wrap for about 20 minutes.
  • You may need to add flour to mixture to make it stick together better. Form into dumplings. (You can either do logs or balls. Logs are probably easier)
  • Roll the dumplings up in tin foil, like candy, so they are well sealed. You could spray the inside of the foil with oil to keep them from sticking, but I found if you peel them carefully, they do okay without.

  • Add them to a pot of salted boiling water. Let cook about 20 minutes. (Pull one out and slice it open. The inside of the dumpling will be dry when it's done cooking)
  • Peel the foil off (be careful- it just came out of boiling water and will be hot!) and serve (slice if you do logs, just leave balls whole)

  • Serve with Rindsrouladen, top with gravy, and enjoy!


Monday, January 16, 2012

Sage Spaghetti with Roasted Sweet Potatoes, Caramelized Onion Sauce, and Toasted Pecans

Sage Spaghetti with Roasted Sweet Potatoes, Caramelized Onion Sauce, Toasted Pecans, Goat Cheese and Brown Butter

I've always loved making fresh pasta. In fact, the first thing I cooked for my husband back when we were dating involved fresh pasta: Chicken Noodle Soup with tri-colored noodles (roasted red pepper, spinach, and garlic-herb noodles). That was before I had my trusty Kitchenaid stand mixer, my food processor, or my newest kitchen toy: pasta roller and cutters for my Kitchenaid. Back then, pasta making was an all-day ordeal. Roasting peppers, steaming and squeezing spinach, kneading and rolling pasta dough by hand, cutting pasta into somewhat uniform sizes... it was tiring! 

Now I can have fresh pasta cooking in under an hour, and we get to have it a lot more often. The first batch I made was sage spaghetti. Fresh herb pasta is easy to do and you can add pretty much any fresh herb you have lying around. Since I had sage, I was inspired by one of my favorites at the Brick Store Pub in Decatur; Pierogies with Browned Butter, caramelized onions, spiced pecans and fried sage. I had pecans, onions, sage, and of course butter. Instead of the potato filling used in the pierogies, I substituted a superfood, sweet potatoes. This time I used goat cheese because that's what was in the fridge, but I think next time I'll use fresh shaved parmesan instead. The goat cheese tends to overpower the other flavors. 


Sage Spaghetti

Ingredients:
2 cups flour
3 eggs
fresh sage

Directions:
  • Process sage in food processor until finely chopped, add flour and process 30 seconds. 
  • Add eggs and blend until a loose ball is formed. It should hold together but not be sticky to the touch. If it's too sticky, add flour 1 tablespoon at a time. If it looks like pebbles, add water 1 teaspoon at the time. Turn out onto floured surface and knead. 
  • Cut the ball of dough into 6 pieces. Cover with plastic wrap and let sit at least 15 minutes, at most 1 hour.
  • Run through pasta roller, starting with the widest setting and thinning until the sheet of pasta is almost translucent and you can see the outline of your hand through the dough. 
  • Switch to spaghetti cutter. Run each sheet of pasta through the roller and hang on pasta drying rack. (If you don't have a rack, get creative- prop a broom over two chair backs and you can dry them over the handle... Just make sure your broom handle is clean!)
  • Let the pasta dry at least 15 minutes. If you're not going to cook it immediately, let it dry an hour and then refrigerate or freeze it. 
  • Boil salted water in a large pot, add the noodles and cook 4-5 minutes until al dente. Drain in a colander. 
  • Top with whatever you have around, or use the following recipes to make it the way I had it.


Roasted Sweet Potatoes
Adapted from Cooks Illustrated

Ingredients:
2 sweet potatoes, peeled and cut in 1/2" dice
1 Tbsp. butter, melted
1 Tbsp. vegetable oil
salt and pepper

Directions
  • Toss diced potatoes with butter, oil, salt and pepper.
  • Line a rimmed baking sheet with parchment or silpat. Arrange potatoes in a single layer. Cover baking sheet tightly with foil. Put in a cold oven and turn on to 425. Cook for about 30 minutes.
  • Remove foil cook until the bottom edges are golden, 15-20 minutes.
  • Flip the pieces over, roast until the bottom edges are golden, 15-20 minutes more. 
  • Let cool 5-10 minutes and serve.

Caramelized Onion Sauce
Adapted from Cooks Illustrated

Ingredients:
4 Tbsp. butter
1 Tbsp. vegetable oil
1 tsp. brown sugar
2 pounds onion, halved peeled and sliced in 1/4 inch slices. (Half pearl onions, whole)
1 garlic clove, minced
1 shallot, minced
1 cup chicken stock (I used homemade, just because I had it around. If you use store-bought, get low-sodium)
1/2 cup dry white wine (2 Buck Chuck works just fine)

Directions:
  • Blanche pearl onions. (Boil for 3 minutes, then immediately in an ice bath) Peel. 
  • Heat 1 Tbsp. butter on high. When the foam subsides, add 1/2 tsp. salt and all the sugar. 
  • Add onions and stir to coat, cook until onions soften and release moisture, about 5 minutes.
  • Reduce heat to medium and cook, stirring frequently until onions are deeply brown and slightly sticky. 
  • Add garlic and shallot, cook until fragrant, about 1 minute. 
  • Add chicken broth and wine, simmer until reduced to about 2 cups, 2-3 minutes.
  • Off heat, whisk in 3 Tbsp. cold butter, 1 Tbsp. at a time. Adjust seasoning with salt and pepper. 
This was really good on top of the pasta, but could be great on some nice toast as an appetizer too.

Your meal is almost ready. Toast some chopped pecans in a saute pan until fragrant and nutty smelling. Be careful not to burn them! Take the pecans out, brown some butter in the same saute pan. Toss the spaghetti with the butter, top with sweet potatoes, then onions, then pecans. Add cheese of your choice. (Like I said, I did goat cheese this time, but would probably go with a hard Italian cheese next time)

Serve and enjoy!